有老師不小心將舊版檔案取代了新版檔案,令之前工作的時間全部浪費了,還要再花時間重做
若果有一套版本控制工作便可以輕鬆管理檔案,即使意外刪除仍可以隨時復原
Git 當然是這種任務的首選工具
Git 是分散式版本控制工具,並不需要中央管理形式的伺服器便可以運作,只需要安裝 Git 的核心功能即可
在 Terminal 輸入
sudo apt-get install git-core安裝 Git 核心
建立 特定資料夾 作為 Git Repository ,在管理上亦比較統一
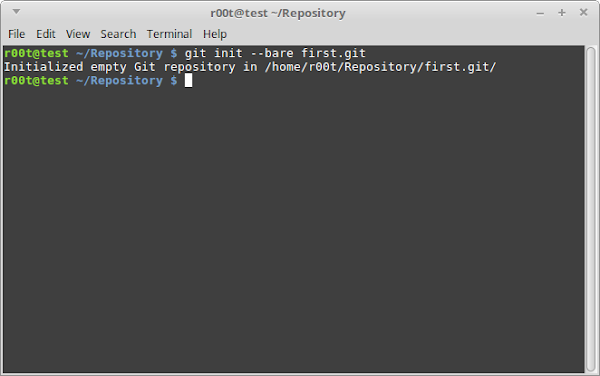
輸入
git init --bare first.git建立一個稱為 first.git 的 Repository
雖然不一定有 .git 的 後綴 ,但通常都會加上,以表示該目錄是以 Git 建立 Repository
first.git 可以是 相對路徑 或 絕對路徑
若果使用 相對路徑 Repository 便會建立在當前目錄中
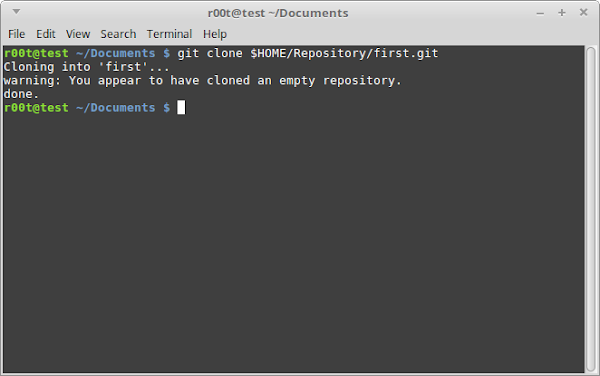
輸入
git clone $USER/Repository/first.git會在當前目錄建立剛才 first 的目錄
由於在下測試時,將 Git Repository 存放左相同使用者的 Repository/first.git 位置
因此目錄位置為 $USER/Repository/first.git
若閣下存放的位置不同需要修改

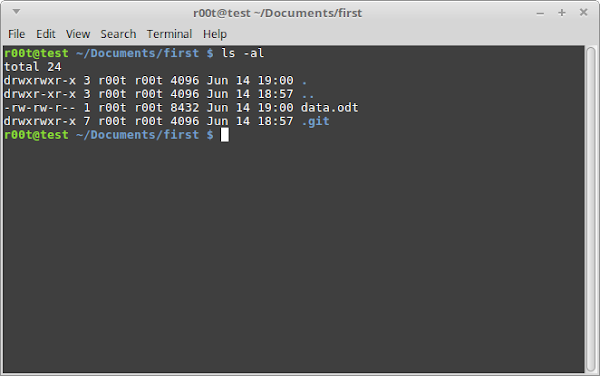
在 first 目錄中建立一些檔案
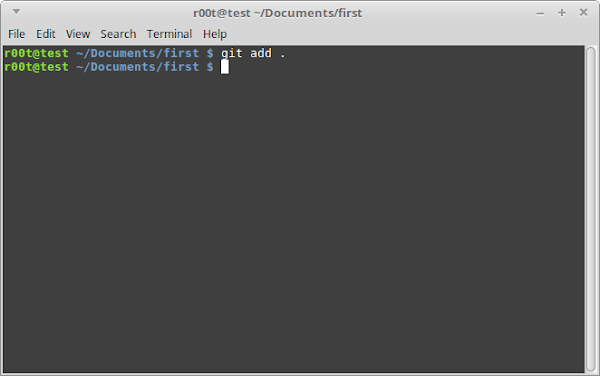
輸入
git add .將該目錄中的所有檔案都加入至 暫存區
若不想全部檔案都加入至 暫存區 ,可以指定檔案名,或使用如 * (星號) 之類亦可
甚至分多次 git add 也可以
輸入
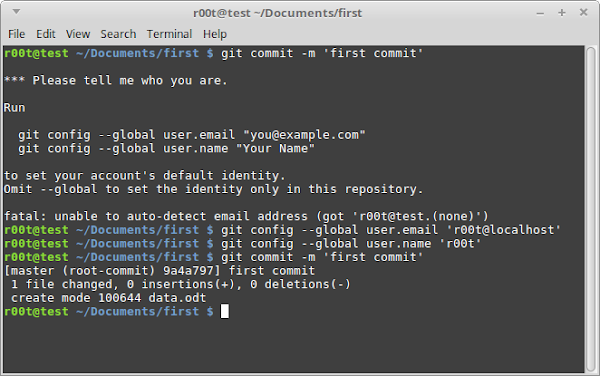
git commit -m 'first commit'提供剛才加入至暫存區的檔案
first commit 只是提交檔案的說明文字,可以修改成閣下需要的文字
但由於帳戶第一次使用 Git ,因此需要設定此帳戶的 Git 資料,輸入
git config --global user.email 'your-email'
gif config --global user.name 'your-name'
your-email 及 your-name 分別填上閣下的 電郵地址 及 名字 ,內容的真確與否則閣下自行輸入
完成使用設定再次輸入
git commit -m 'first commit'便正式提交 暫存區 的檔案
輸入
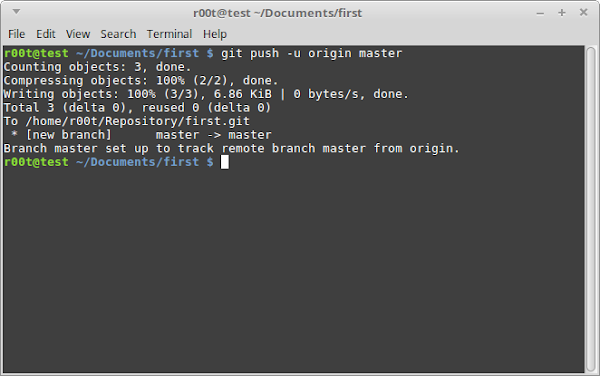
git push -u origin master正式將暫存區的檔案推送到 Repository 儲存
-u 將分支追蹤指定的分支
origin 是 Git 自動產生的 Repository 的名稱
master 是位於 origin 中的分支名稱,可以需要推送到其他分支可以使用其他名稱
若分支是第一次使用會自動建立新的分支名稱

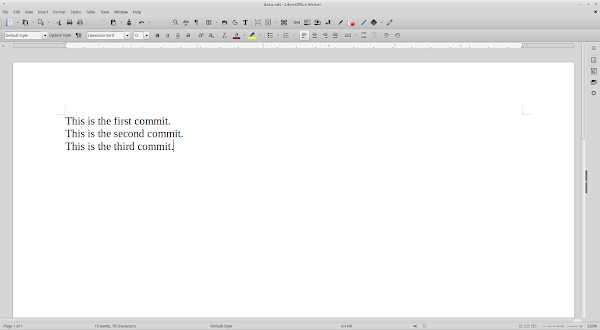
再次更新檔案
再輸入
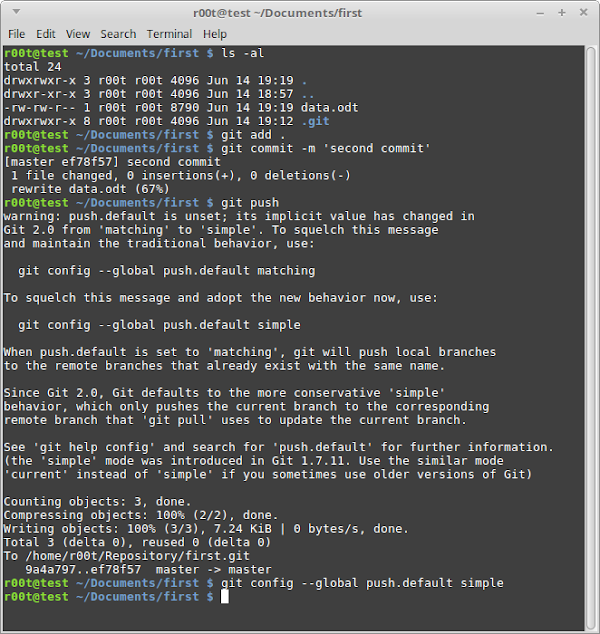
git add .
git commit -m 'second commit'
git push
由於已經設定 電郵地址 及 名字 ,因此 git commit 不再有警告
之前推送時已經追蹤 origin/master 的分支,若繼續將檔案推送至 origin/master ,可以簡單使用 git push 即可
但由於帳戶第一次使用預設推送方式,因此需要設定此帳戶的預設推送資料
Git 2.0 之前的版本,預設使用 matching 會將所有同名的分支都推送,若只有一個分支問題不大,若超過一個分支全都都推送便可能有些微混亂
若想避免產生潛在影響,可以輸入
git config --global push.default simple使用 simple 只推送正在追蹤的分支
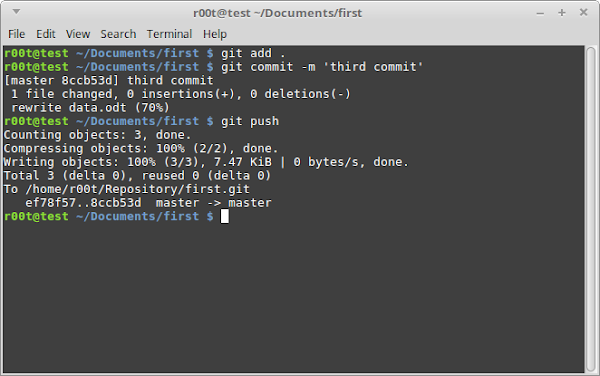
再次測試,便沒有問題
Git 能進行版本控制,可以根據需要,返回某個版本的狀態
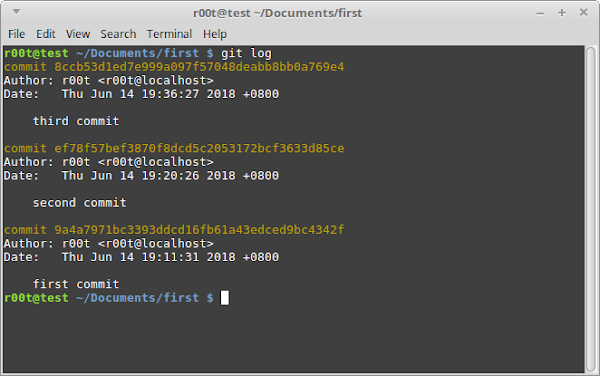
輸入
git log來查看 Repository 的 日誌資料
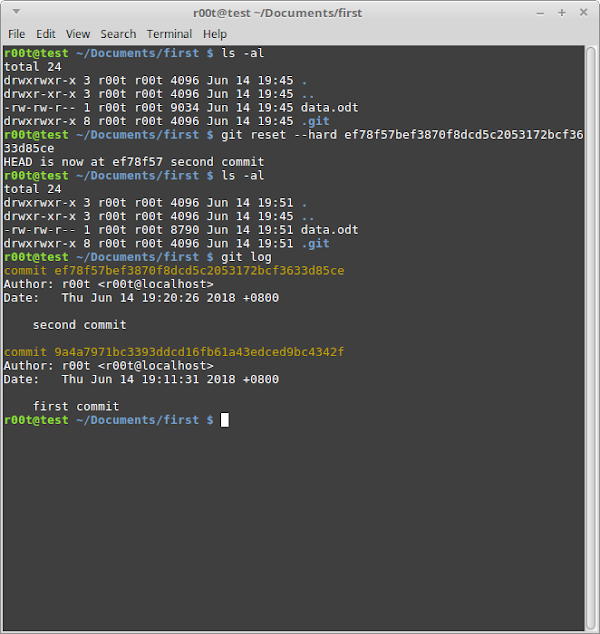
從 git log 中查看需要返回版本的 Commit ID ,輸入
git reset --hard 'commit-id'便可以在不影響 Repository 的狀態下返回該版本
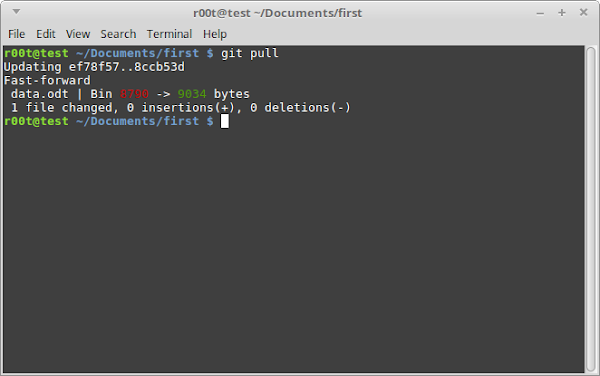
若需要重置成最新版本,輸入
git pull
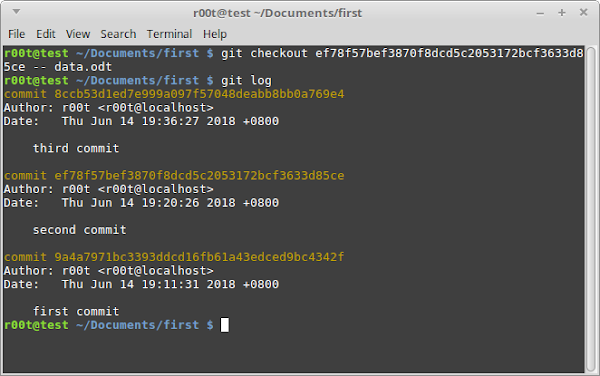
若想在返回某個提交狀態仍能繼續推送新的版本到 Repository ,輸入
git checkout 'commit-id' -- 'your-file'git checkout 能指定檔案,並返回指定提交版本
指定檔案亦可以使用 * (星號)
若果需要讓遠端連接至本機,需要安裝 OpenSSH伺服器 ,輸入
sudo apt-get install openssh-server
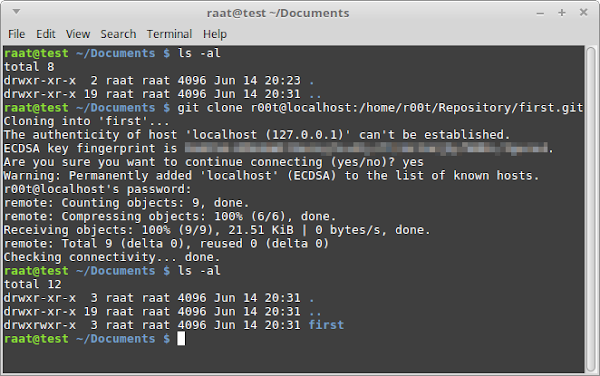
在遠端輸入
git clone <username>@<hostname>:<port><pathname>username 為該 Git Repository 的擁有者帳戶
hostname 為該遠端位置,可以是 IP 或 域名
port 為 SSH伺服器 的連接埠,若使用預設的 22連接埠 可以不需要填寫,連 : (冒號) 都可以不填寫
pathname 為該 Repository 於該遠端的目錄位置
若果是第一次連接到 OpenSSH伺服器 ,會詢問存取遠端位置
然後輸入該 帳戶的密碼 ,便可以從遠端複製 Repository 至本機
由於在下只是使用相同電腦,但以不同帳戶登入,因此使用 localhost 但操作上是相同
此文章只簡單介紹 Git 的基本功能
若需要學習 Git 可以到 git-scm.com 查看關於 Git 的詳細使用資料
在下發現使用本機建立 Git Repository 執行 git clone 使用 相對路徑
即使已經執行 git add 及 git commit ,當執行 git push 只會出現 Everything up-to-date ,不能推送資料
原來必須使用 絕對路徑 才能推送資料
沒有留言 :
張貼留言